
Troubleshooting

Shade Is Too Narrow (Inside/Jamb Mount)

If the shade is slightly too narrow for the window opening, try one of the following adjustments:
  1. Adjust the End Plug Pin:
    The round steel pin in the end plug can be extended up to 1/8 inch. Carefully pull the pin outward using pliers to increase the shade width.
  2. Adjust In-Jamb Bracket Placement:
    For inside/jamb installations, move the mounting brackets closer together by placing a wood shim, penny, or washer behind the brackets to reduce the gap.

Shade Is Too Wide (Inside/Jamb Mount)

For proper operation, the steel tube should extend approximately 1/8 inch beyond the edge of the fabric. The fabric should always be slightly narrower than the tube.

Warning: Operating a shade that is too tight within the window opening can cause the tube to bend during operation, resulting in damage to the shade and impaired performance.

If trimming the tube is not practical, consider relocating the brackets and installing the shade as a ceiling mount or outside mount. Do not file, cut, or modify the end pins.

If the shade must be returned to the manufacturer for a width reduction (cut-down), a Return Authorization (RA) Number must be obtained before the product can be accepted for return. If the required cut-down is not due to a manufacturing error, a service charge may apply.
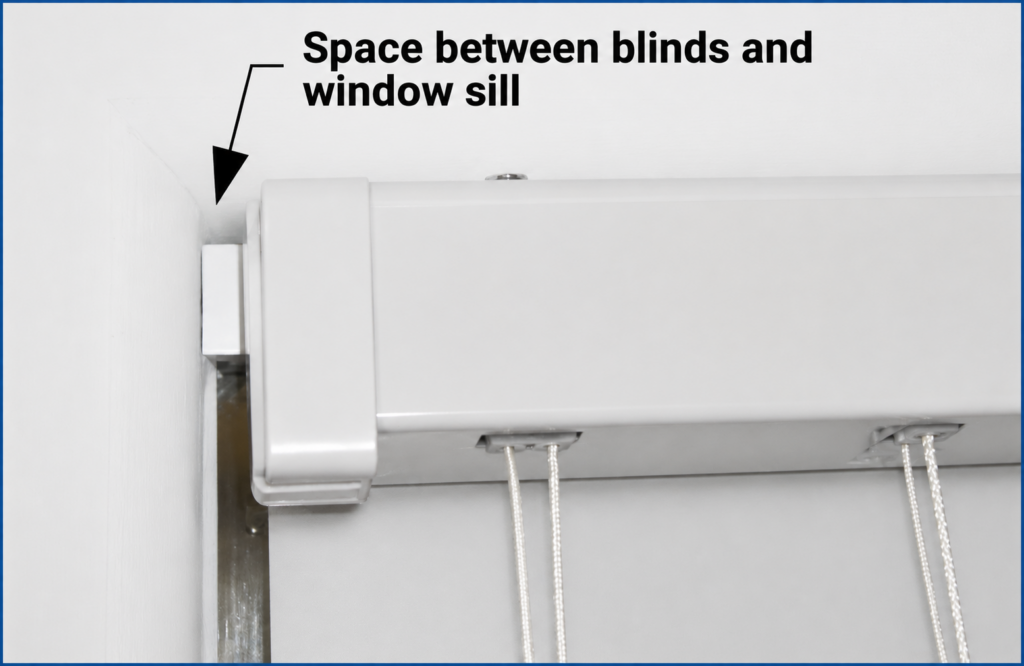
Shade Is Too Narrow (Inside/Jamb Mount)

If the shade is slightly too narrow for the window opening, try one of the following adjustments:
  1. Adjust the End Plug Pin:
    The round steel pin in the end plug can be extended up to 1/8 inch. Carefully pull the pin outward using pliers to increase the shade width.
  2. Adjust In-Jamb Bracket Placement:
    For inside/jamb installations, move the mounting brackets closer together by placing a wood shim, penny, or washer behind the brackets to reduce the gap.


Shade Does Not Track Straight (“Telescoping”)

Shade Rolls Up Unevenly (Telescoping)

One of the most common issues with roller shades is telescoping, which occurs when the fabric gradually shifts to one side as the shade is raised. In most cases, this is caused by the shade not being installed level. Fortunately, the problem can usually be corrected without removing the shade.

Troubleshooting Steps

  1. Check the mounting brackets
    • Verify that both brackets are properly aligned and securely fastened.
    • Ensure the brackets are level from side to side.
  2. Check the roller tube
    • Confirm that the roller barrel (tube) is level.
    • Use a level to accurately verify the installation.
  3. Correct fabric telescoping
    • If the brackets and roller tube are level but the shade continues to roll unevenly, the fabric itself may have a tendency to telescope.
    • Lower the shade until the point where the fabric attaches to the roller tube is visible.
    • Place a small piece of masking tape on the roller tube at the fabric attachment point on the opposite side from the direction the shade is telescoping.
    • Roll the shade up and test its operation.
    • If additional correction is needed, apply a second or third piece of masking tape in the same location until the shade rolls evenly.

This simple adjustment creates a slight buildup on the roller tube, helping guide the fabric back toward the center and allowing the shade to roll up more evenly.
SHADES NOT OPERATE OR ARE HARD TO OPERATE
  • Are the brackets tight against the roller?
  • Is the shade tight against the window return?
  • Are your brackets bent in or out?
  • You should have 1/16” – 1/18” side-to-side shade movement.
  1. Spring rollers – check for tension or proper spring tension.
  2. Chain mechanism – Is the chain connector being pulled into the sprocket?  If so, remove the sprocket cap that holds the chain on and readjust the chain.  Or remove the shade from the brackets and hand-roll up or down to align the connector.  When the shade is up, the connector should be at the end and to the rear (side closest to the window).
  3. Is the chain long enough to allow the connector to travel the full length?  Does the connector start at the top-rear and finish at the top-front?  The chain should be at least ½ the shade height.
  4. The chain mechanism may not be moving freely.  Remove the shade from the brackets, pull the chain mechanism out of the tube, hold the outer rim with your hand, and pull the chain.  Does it rotate?  To reorder, measure across tube – 1 3/8” (size of a half dollar).
  5. Are the white plastic bracket inserts matched with the shade ends properly (C-2 mechanism)? Wide opening for the end plug (idler) and narrow opening for flat chain mechanism end.  The wide side of the chain sprocket cap will be at the top (C-2 mechanism).
  6. The chain should go over the top of the chain mechanism sprocket.

Solar View – Roll Shade Measurement Guidelines

SolarView will provide custom roll shades made to the measurements that the customer records.

1. Understanding Measurements

  • All measurements must be recorded in inches, rounded down to the nearest 1/8 inch.

    • Width = Left to right
    • Height = Top to bottom
    • Depth = Front to back (inside the window casement)

2. Important Requirements

    • Measure at the bracket installation points.
      The width must be taken at the exact location where the brackets will be mounted.
      Do NOT measure based on the desired shade fabric size.
    • Use a steel measuring tape only.
      Cloth or flexible tapes are not accurate enough.
    • Accepted units: Inches with fractions (rounded down to nearest 1/8″).
      Feet, decimals, and metric measurements will not be accepted.
    • Record exact window measurements.
      Do not add or subtract anything—Solar View will make appropriate manufacturing adjustments.

3. Rounding Instructions

  • Round down to the nearest 1/8 inch.
    Examples:

    • 35 3/16″ → record 35 1/8″
    • 27 5/32″ → record 27 1/8″
    • 42 7/16″ → record 42 3/8″

Tools Needed

Included Hardware

  • Cordless drill or screwdriver
  • ¼” hex drive attachment
  • Tape measure
  • Pencil & level
  • Possibly a 3/32″ drill bit
  • Specific wall anchors when needed
  • 2 universal brackets
  • 4 × #6 × ¾” self‑tapping screws (for wood, sheet metal, aluminum)
  • 2 flat‑head screws for clutch side (inside/jamb mount)

Mollies/toggles for plaster, drywall, or concrete are not included.

Bracket Notes:

Faber/Benthin universal brackets may be mounted left or right, inside, outside, or on the ceiling. Brackets must be installed perfectly level for proper shade operation.

Standard bracket length: 1 3/8″. Extended length: 2 3/8″.

Inside Measurement (IM) Guidelines

What is an Inside Measurement (IM)?

  • Inside Measurement refers to ordering a shade to be installed inside the window casement. When you provide an IM width, you are giving the exact space within the opening.
    The factory will then take precise deductions to ensure the shade, brackets, and rotating control mechanism fit properly.

Factory Deductions & Side Gaps

  • Round down to the nearest 1/8 inch.
    Examples:

    • 35 3/16″ → record 35 1/8″
    • 27 5/32″ → record 27 1/8″
    • 42 7/16″ → record 42 3/8″
  • Because of these required deductions:

  • IM shades will ALWAYS have a gap of up to 5/8” on both sides

  • (± 1/8” depending on tolerances)

    This gap is necessary so the shade can raise, lower, and rotate freely.

Example

  • If you order a shade at:

    • IM Width: 70”

    The shade will be manufactured to fit within that 70” space.
    However, due to bracket/mechanism allowances:

    • Approximate material width (including bottom bar): 68 ¾”

    This remaining space is the functional “gap” required for operation.

When IM Gaps Are Not Acceptable

If the side gap is visually unacceptable or you need more complete coverage:

Consider an Outside Bracket Mount (OB)

Mounting the shade on the wall, trim, or mullion allows you to add width beyond the window opening and cover more area.

When IM Gaps Are Not Acceptable

If the side gap is visually unacceptable or you need more complete coverage:

Consider an Outside Bracket Mount (OB)

Mounting the shade on the wall, trim, or mullion allows you to add width beyond the window opening and cover more area

Important Ordering Rules

  • Do NOT use fabric/material width or bottom bar width as measurements.
    These are not accepted for ordering and will result in incorrect shade sizing.
  • Record only true window opening dimensions.
    The manufacturing team will apply all appropriate deductions.
  • Check for obstructions.
    Trim, molding, handles, sensors, and other protrusions must be measured and accounted for before ordering.
  • Photos or additional measurements may be required to ensure a proper custom fit.

Outside Measurement (OM / OB) Guidelines

What Is an Outside Measurement (OM)?

  • Outside Measurements—also referred to as Outside Bracket (OB) measurements—are used when mounting the shade outside the window casement. This includes mounting on:

    • The outer window casing
    • Wall surface
    • Ceiling
    • Trim or molding
    • Mullions
  • When you provide an OM/OB measurement, you are giving the exact dimensions you want the shade to cover, based on where the brackets will be installed.

Factory Deductions

  • OB measurements are manufactured with NO factory deductions.

    The shade will be made exactly to the width and height you order.

    This gives you complete control over the final coverage area.

Improved Light Gap Coverage

  • For Outside Mount installations, you can eliminate or reduce light gaps by:

     Simply adding extra width to your bracket mounting measurement.

    Because the shade sits outside the opening, you can widen the shade beyond the window frame to improve privacy and light control.

Golden Rule for OB Measurements

Always measure to and from the exact points where the brackets will be installed.

This ensures:
  • Correct overall width
  • Proper bracket alignment
  • Accurate shade fit